Cedar Spirits Cabinet: Part 2

It’s been a while… so I’d like to pick up where I left off and bring you up to date with what’s been happening around here. The Cedar Spirits Cabinet is long since completed, but I haven’t shown you how it came together.
Let’s begin by applying some shellac to the interior of the back panel.

Below, hand planing the fit of the interior partitions to the back panel.

Followed by a glue-up.

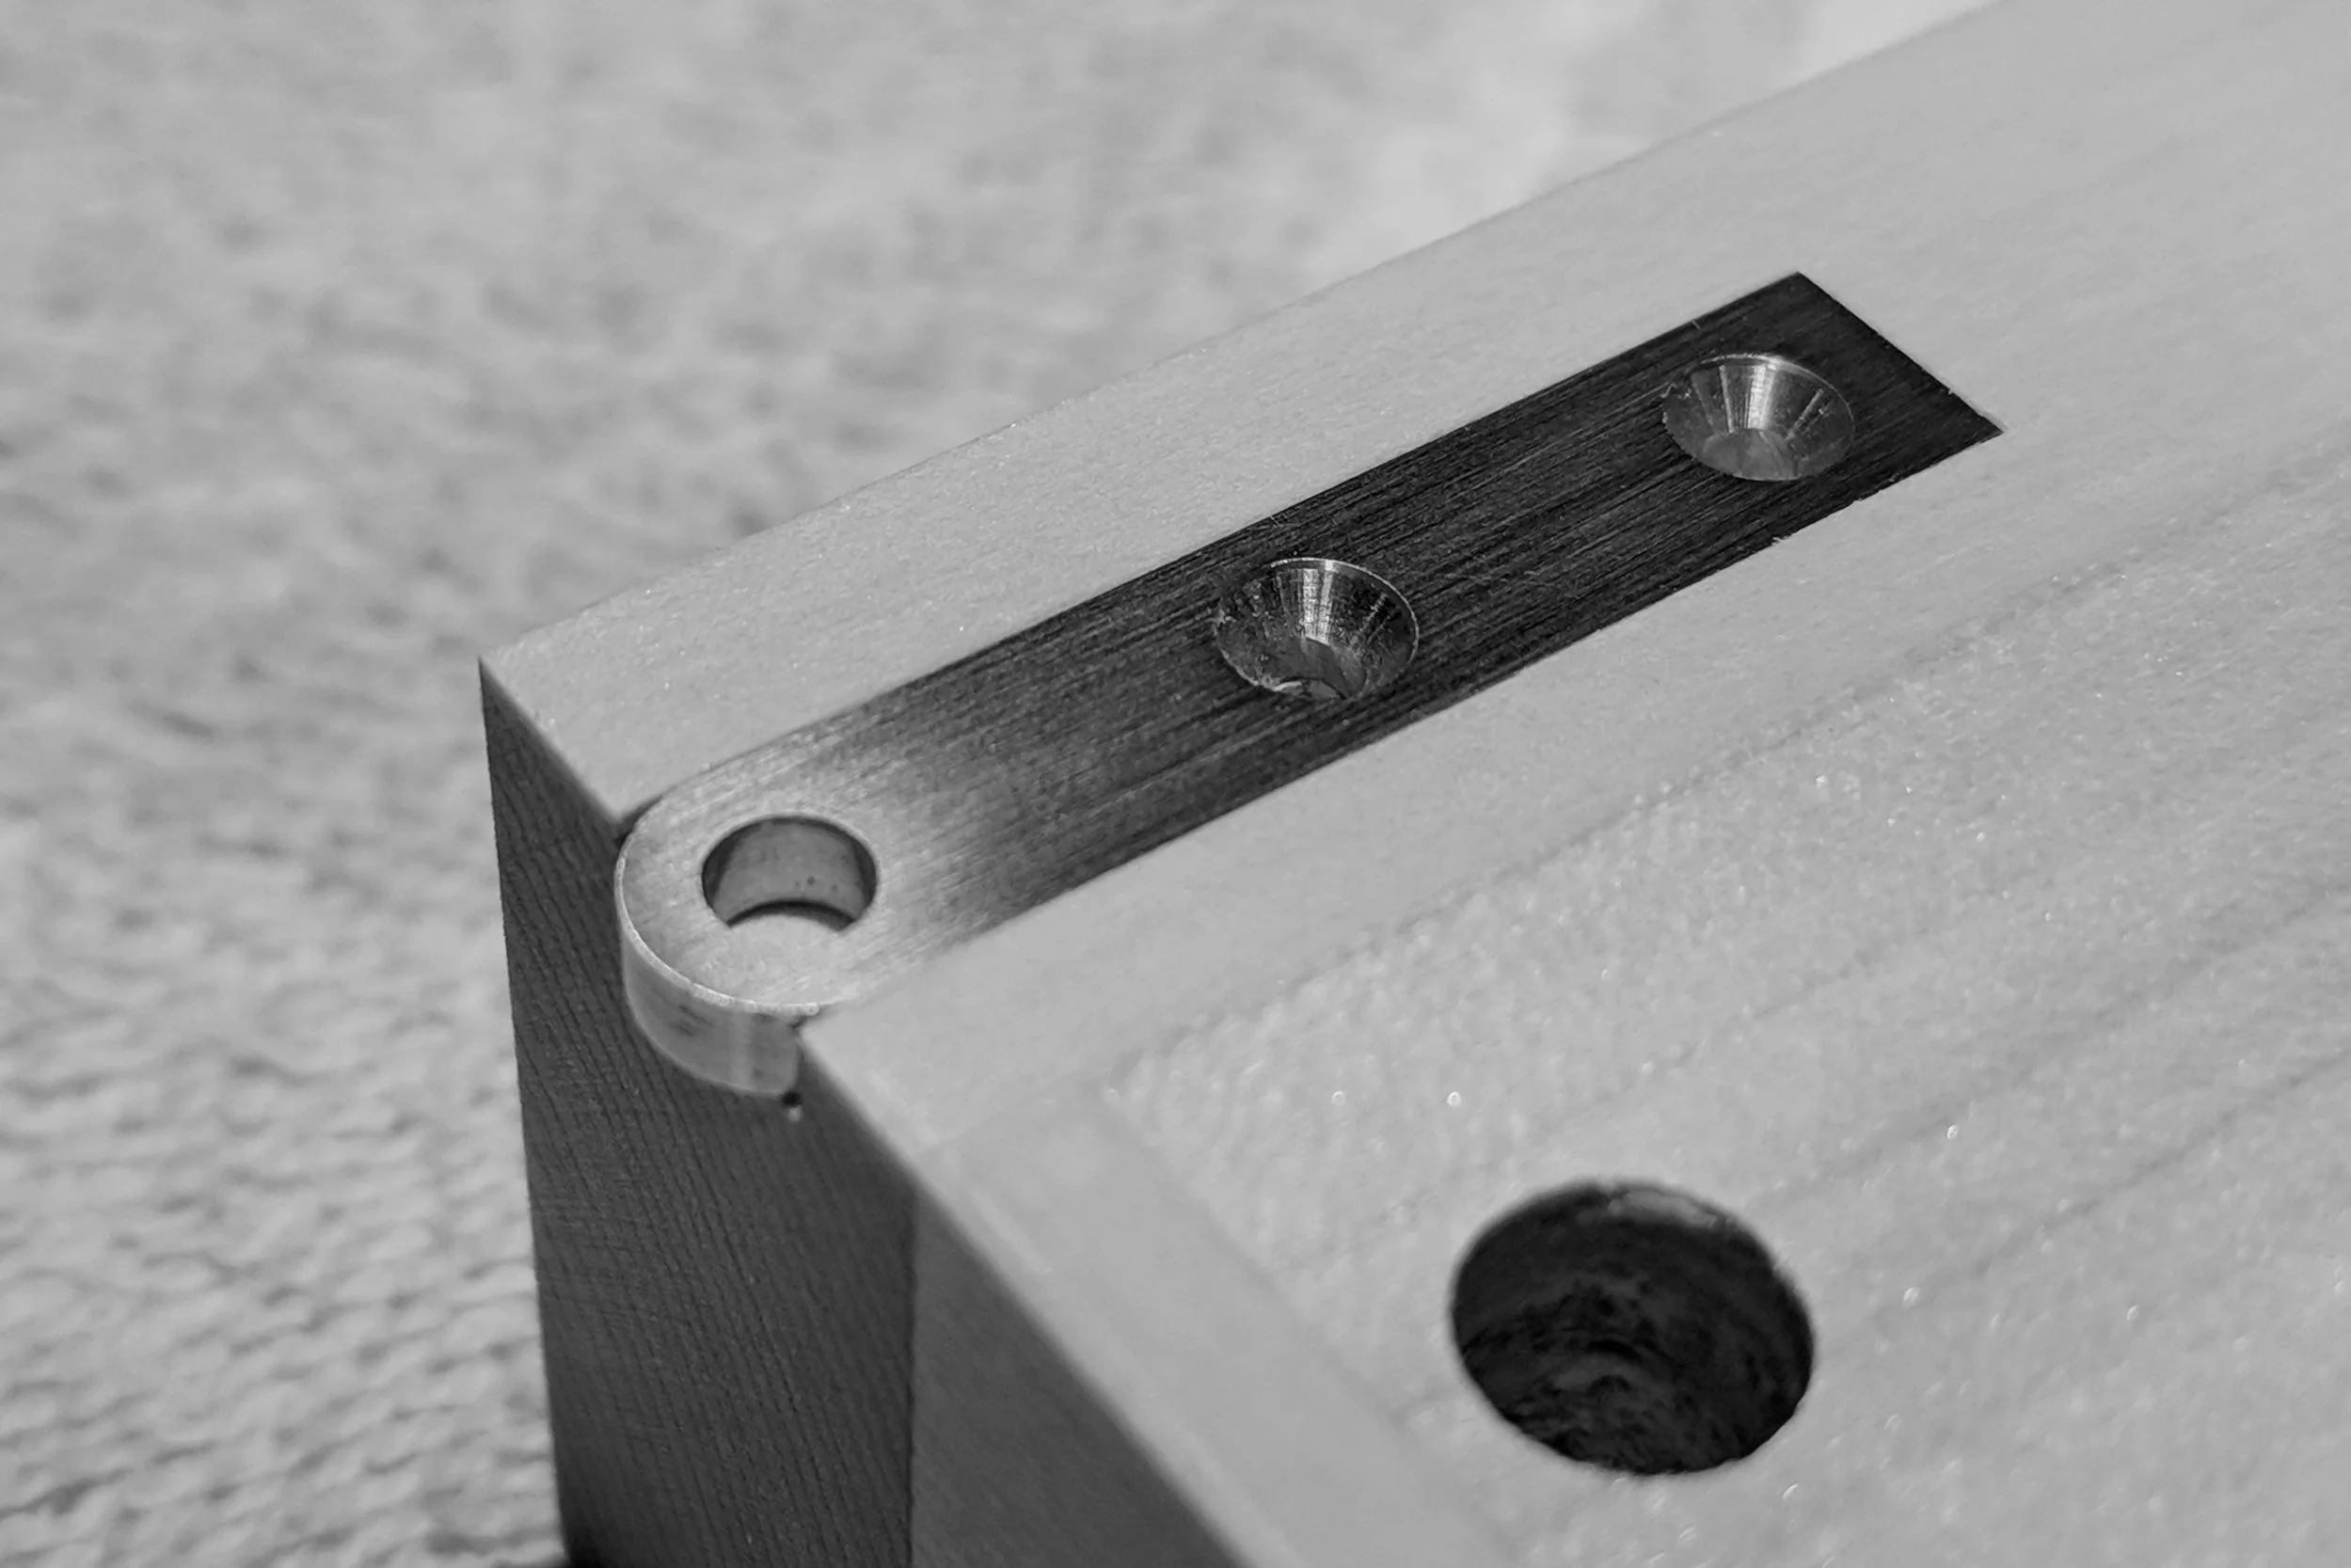
I ordered brass knife hinges from Sanderson Hardware.

Beautifully made and a pleasure to install.

Next, I prepared the back assembly to receive the side panels.

Checking carefully for a good fit.

A series of two glue-ups and the side panels are in.

This was a fairly involved glue-up. Risk level was high, as I had no additional yellow cedar material to cover for me if I made any mistakes!!! A good solid gluing set-up makes for a successful result… whew!

Out of the clamps.

My attention then turned to the top and bottom panels as I prepared them with edgebands.

The larger edgebands at the front and rear of the top will be to support a glass top.

I think (?) I mentioned in an earlier post that this piece is a collaboration with Carol, our resident handweaver. It’s time to select and order colors for the runners that will adorn the cabinet.

Preparing for the top and bottom assemblies.

Mortising the hinges into the top and bottom panels prior to glue-up.

Final surface preparation of the main body of the cabinet.

And softening of the edges…

Same goes for the top and bottom panels.

Shellac on the interior surfaces.

And oil on the exterior.


Next time we’ll take a look at the Honduran mahogany stand.
Hej då!
Craig