Cedar Spirits Cabinet: Part 5

The final task to complete this cabinet is making the two drawers. Honduran mahogany for the drawer fronts, and deodar cedar for the sides, backs and bottoms.
I laid out the half blind pins and began sawing and chopping on the drawer fronts. First one end…

… and then the other.

The chopping block set-up.

Cleaned up and ready for the tails.

But first the rear pins on the drawer backs.

The front tails on the drawer side below are ready for a final chop with a freshly honed chisel.

Fitted by hand using a paring chisel.


All the front tails now fitted. The chisel on the right in the photo below is the shop made tool that I use for paring and fitting the tails into the pin sockets.
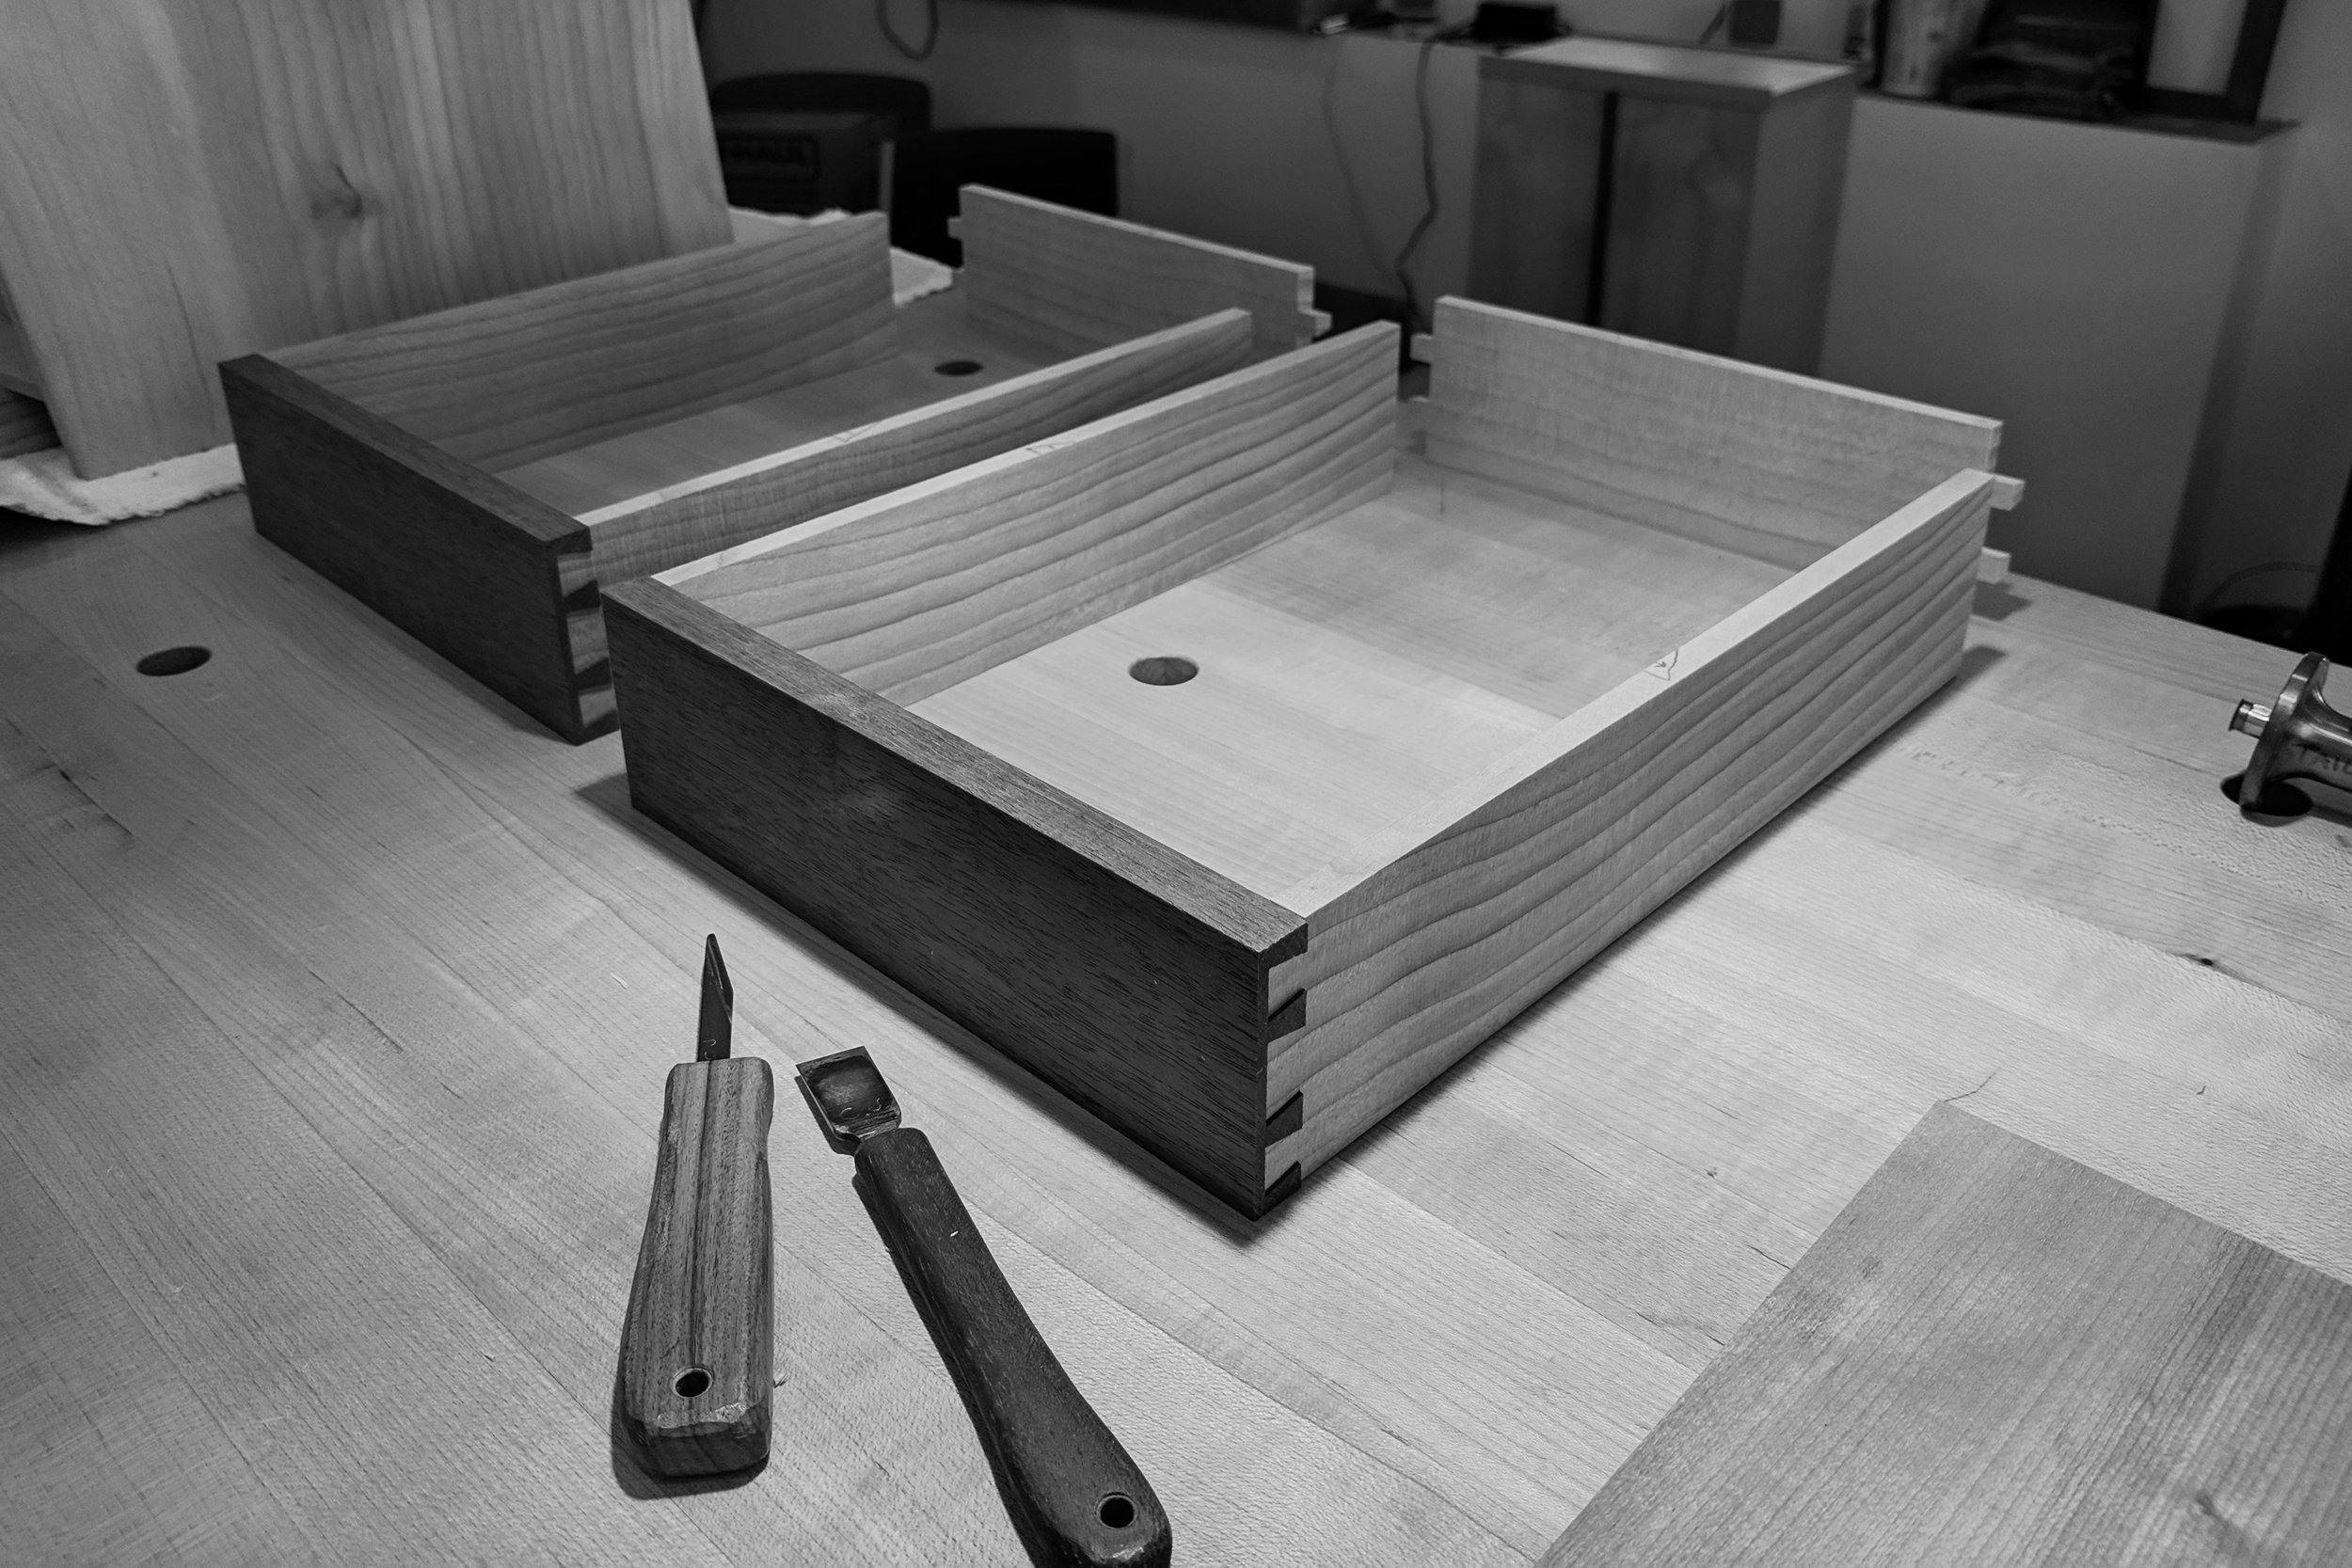
And, at last, all the corners are dry fitted.

I chose to carve a relief on the interior side of the drawer fronts for the cutout pulls.

I applied two light coats of shellac to the interior surfaces.

Glue-up time.

Out of the clamps.


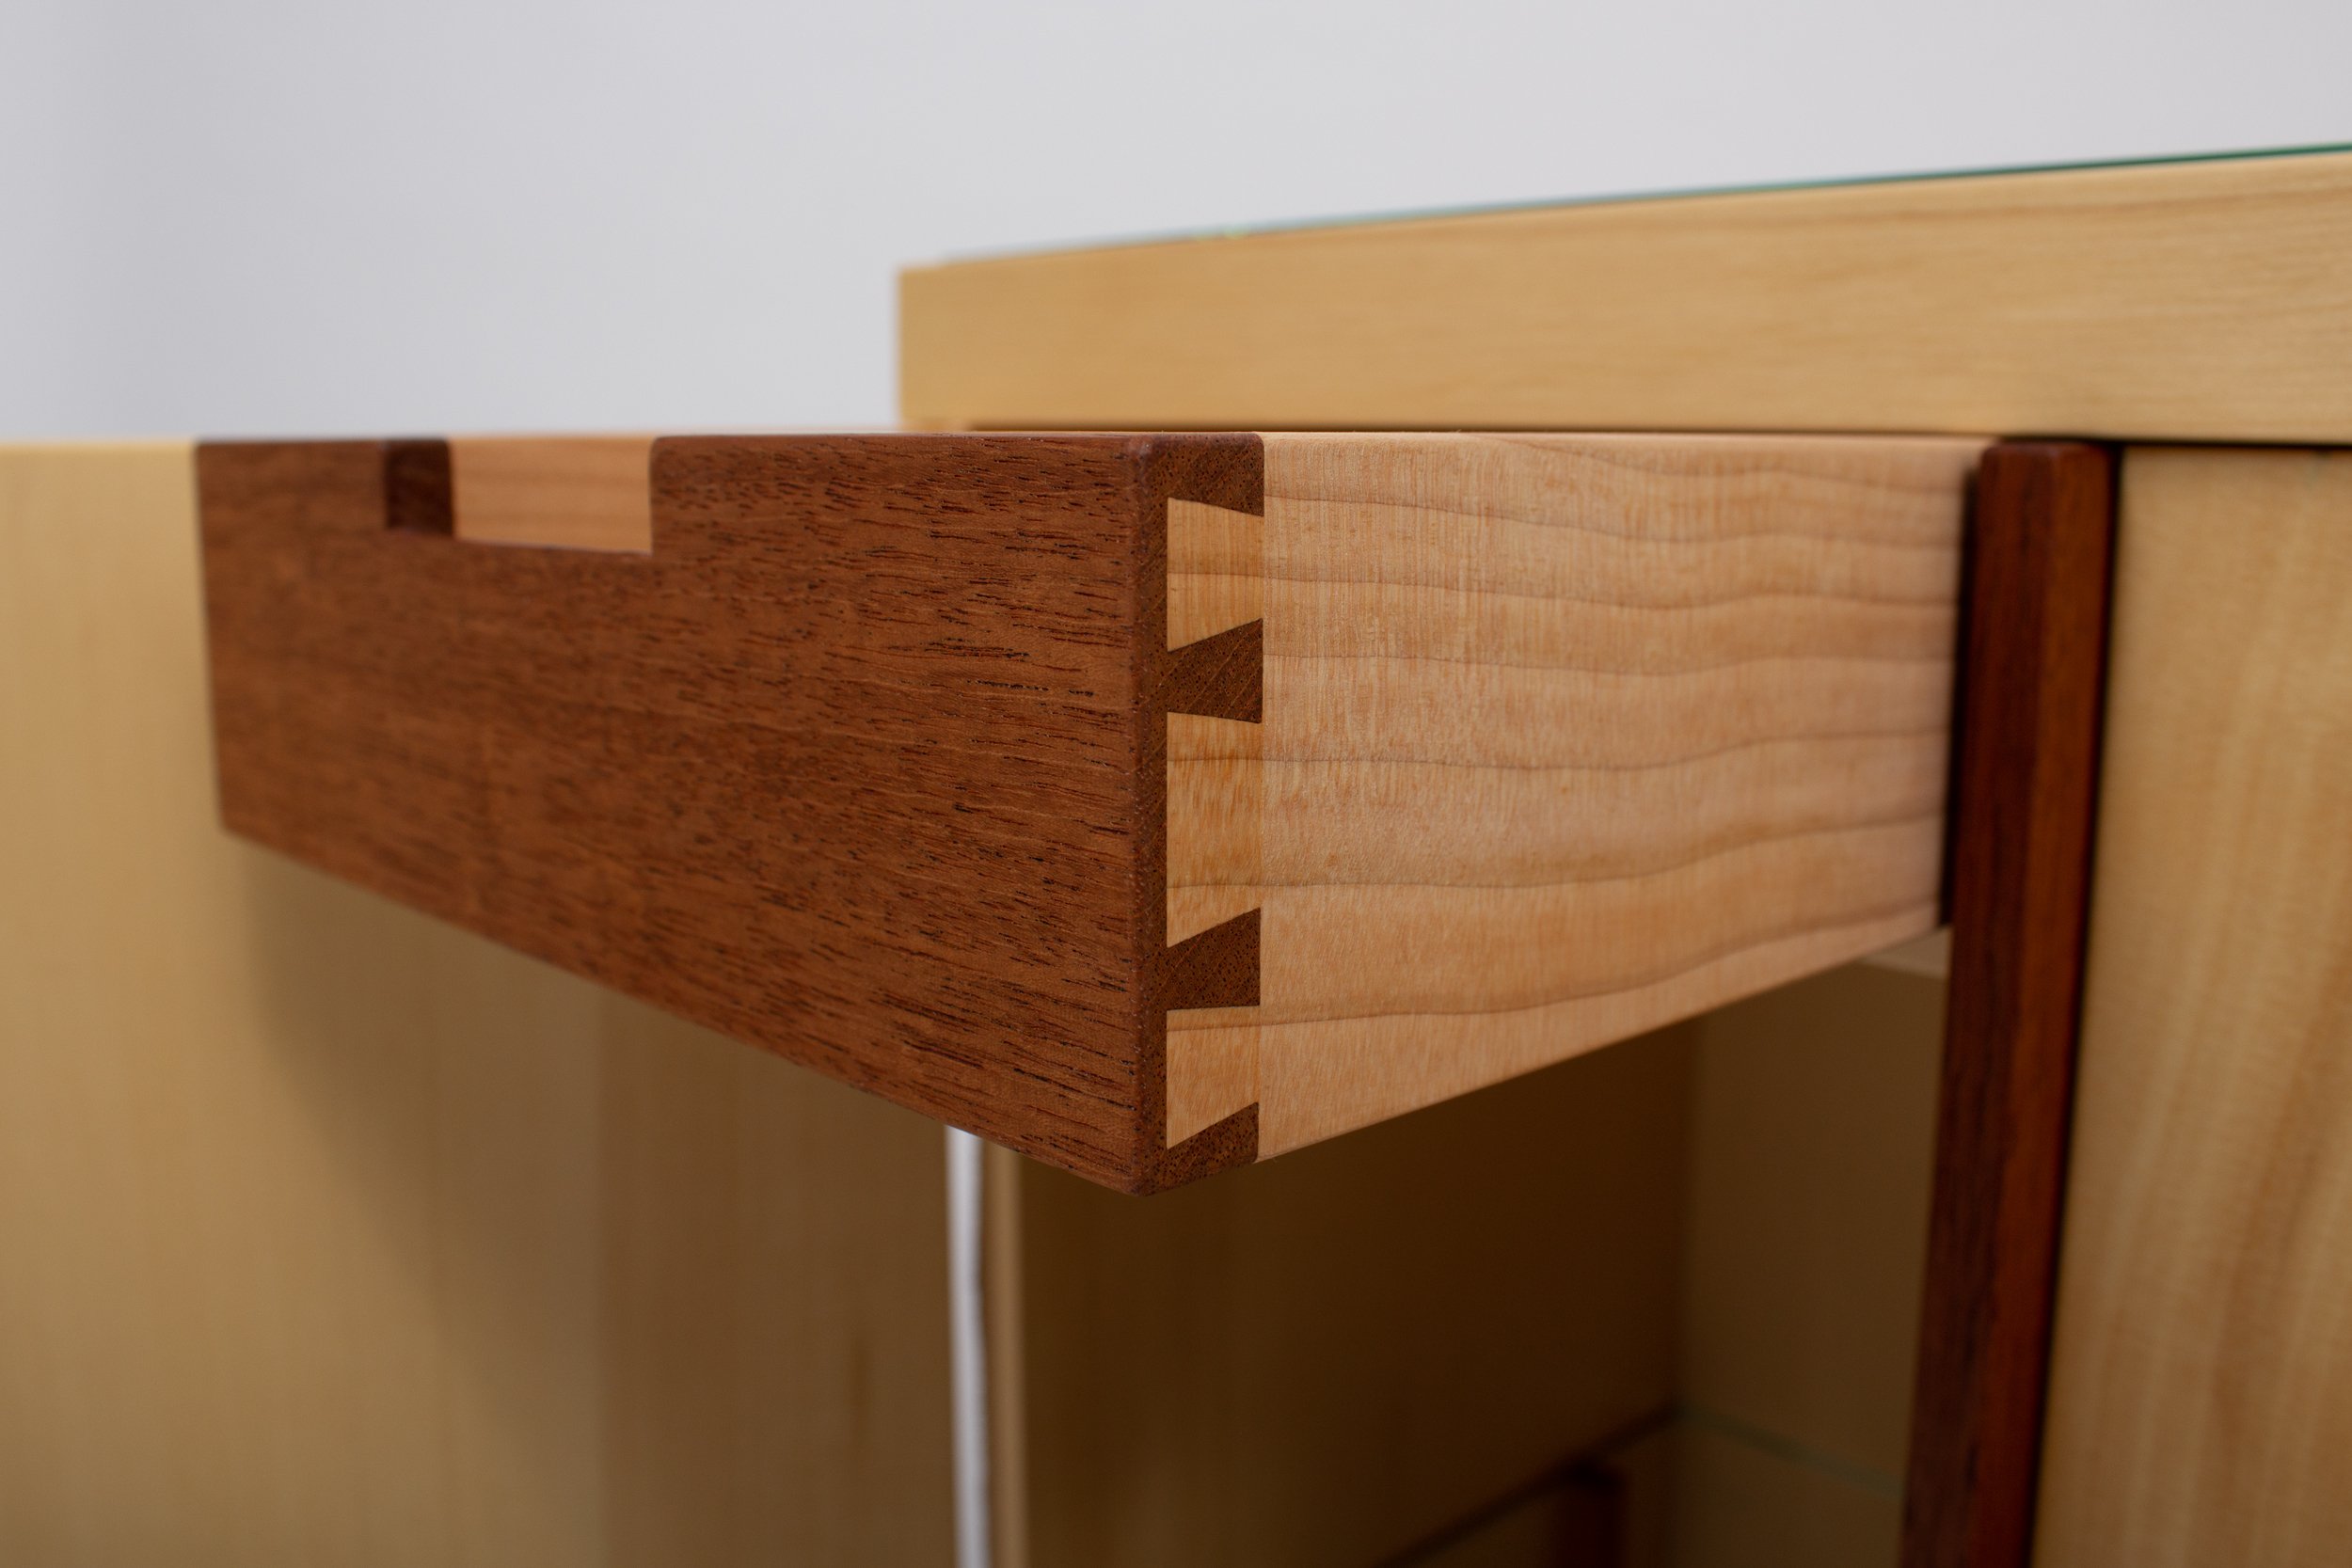
The block plane is used to make the drawer front flush with the drawer side.


I don’t have any photos of the making of the drawer bottoms, but you can see more of them in the photos of the final piece found in my Shop.
Also, please check out the Woodworking Gallery for even more color images of the completed Cedar Spirits cabinet.
Hej då!
Craig