3 Magic Steps From Squiggles to Cloth
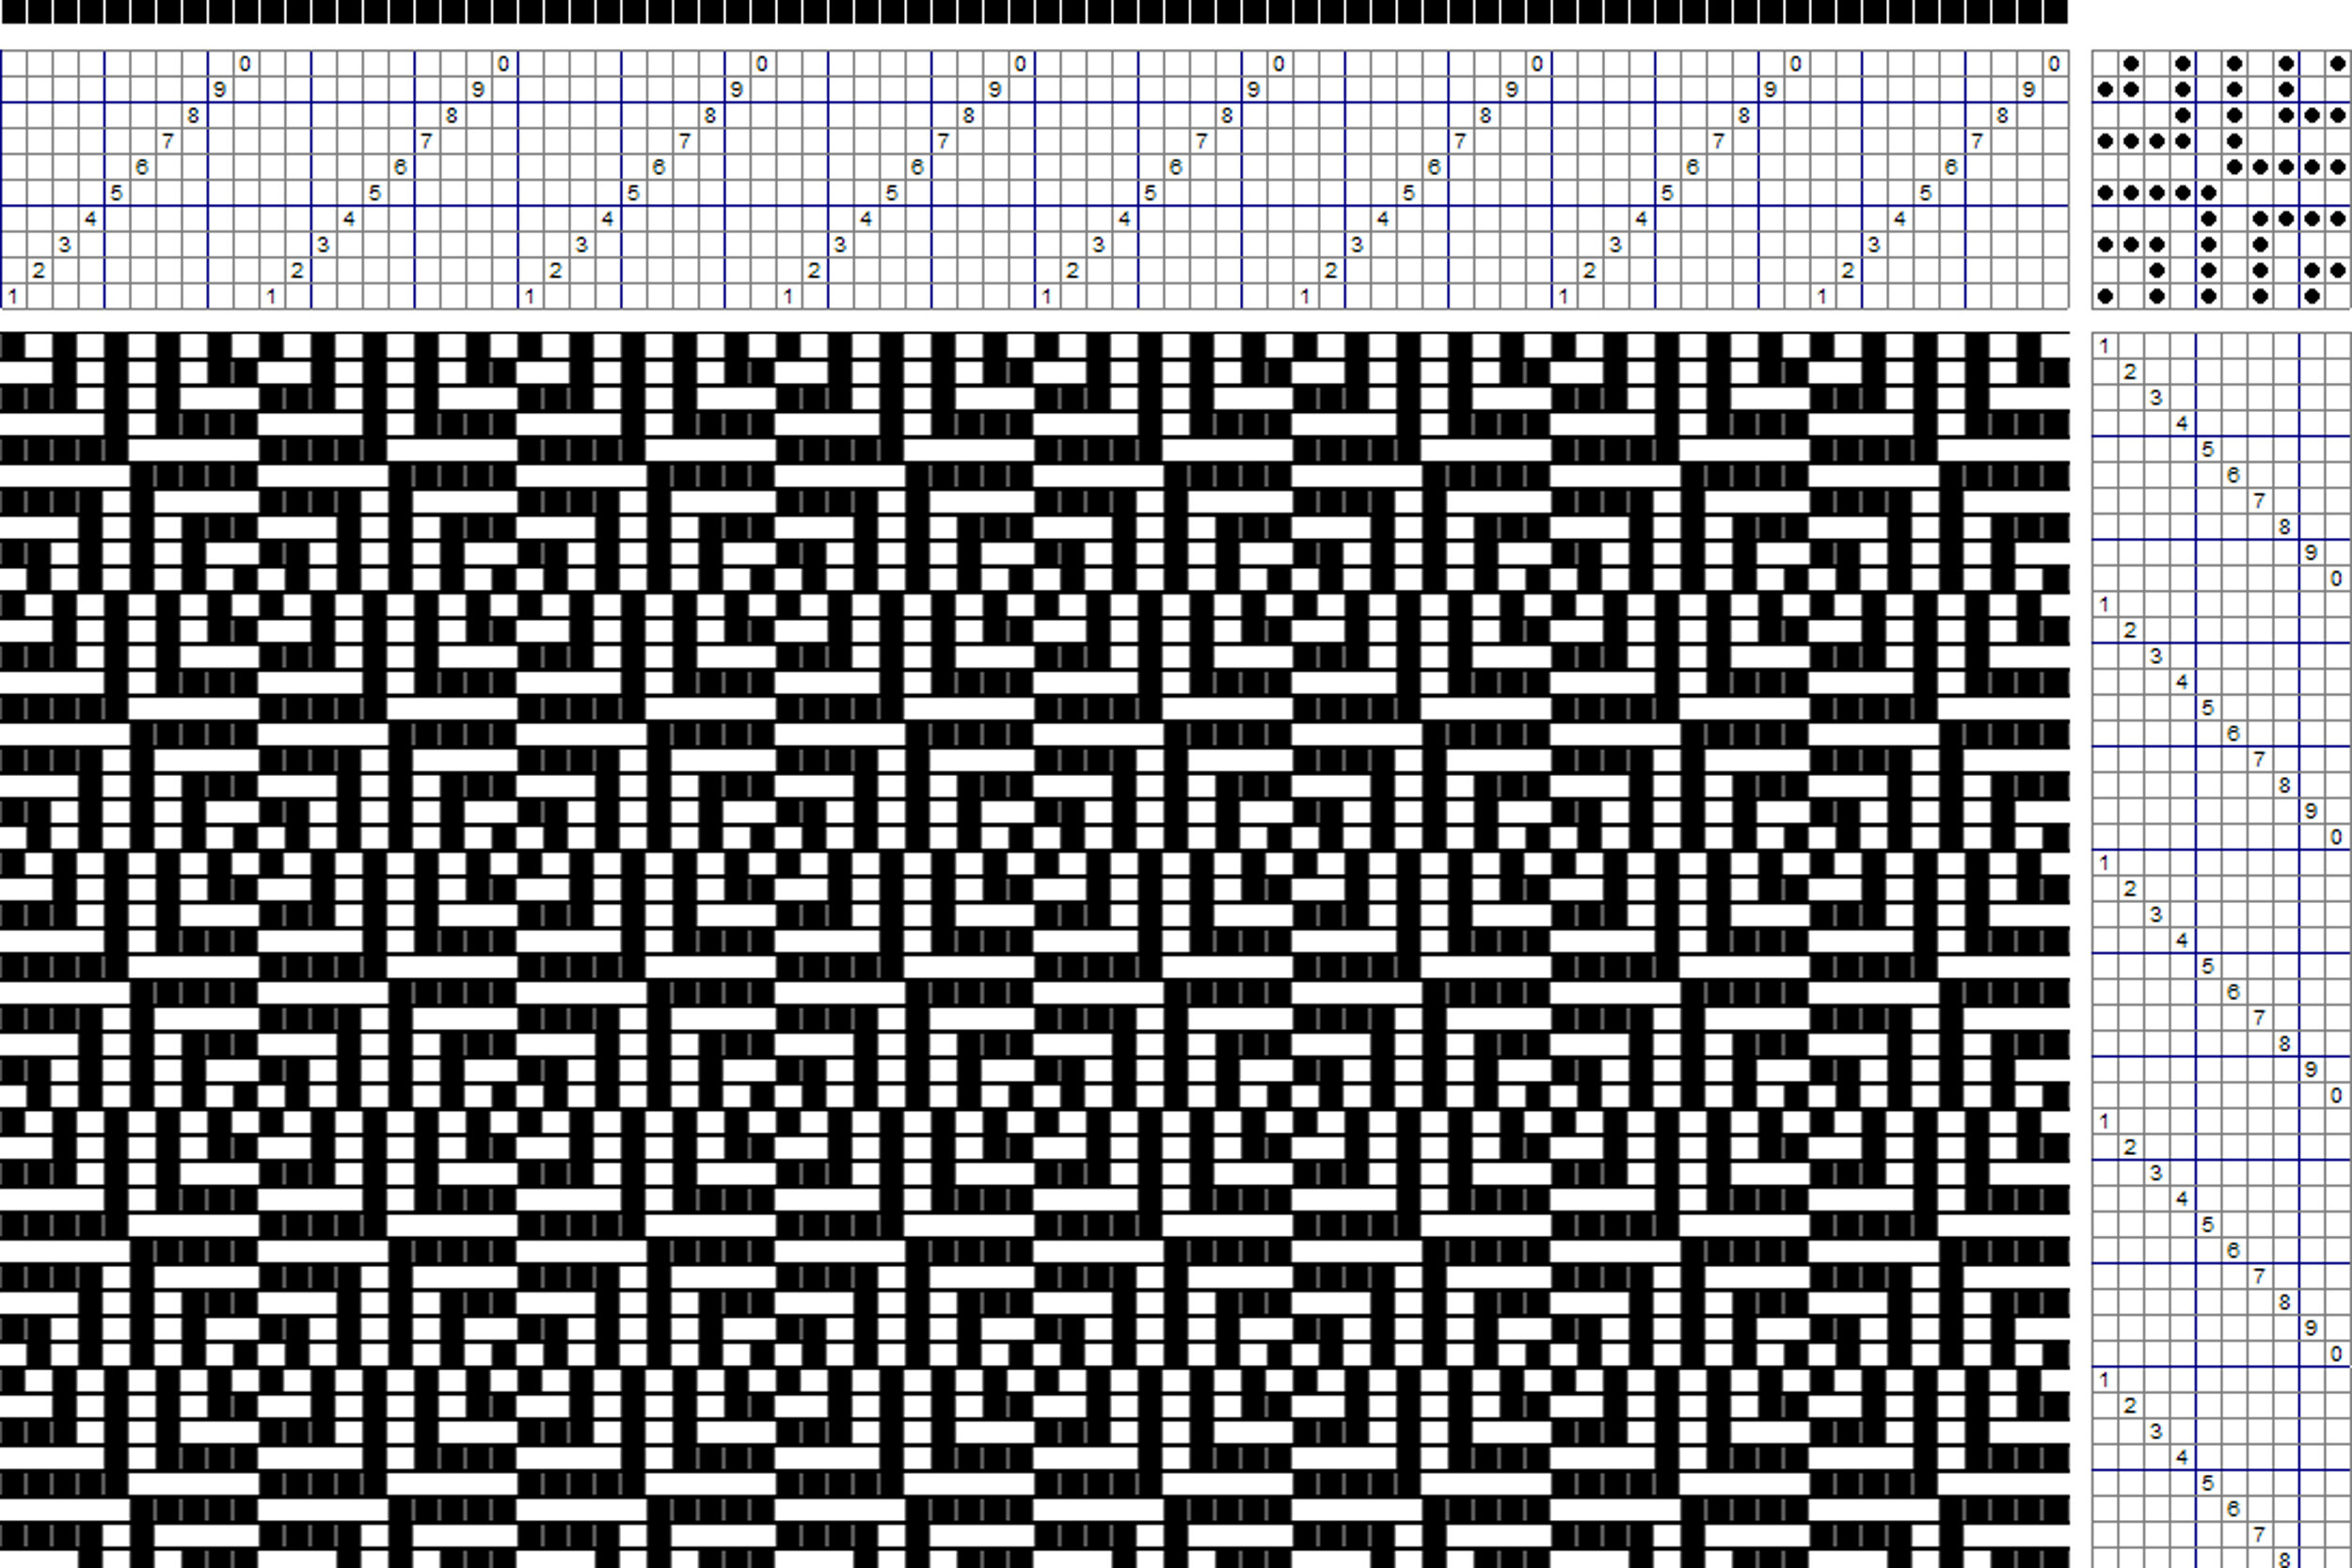
When I first saw a similar version of this spidery looking weaving draft in print, I was intrigued. I liked the geometric, kaleidoscope maze-like nature of it. But do you see those long floats, where one thread travels uninterrupted over several other threads? That’s always a sign that something interesting is going to happen.
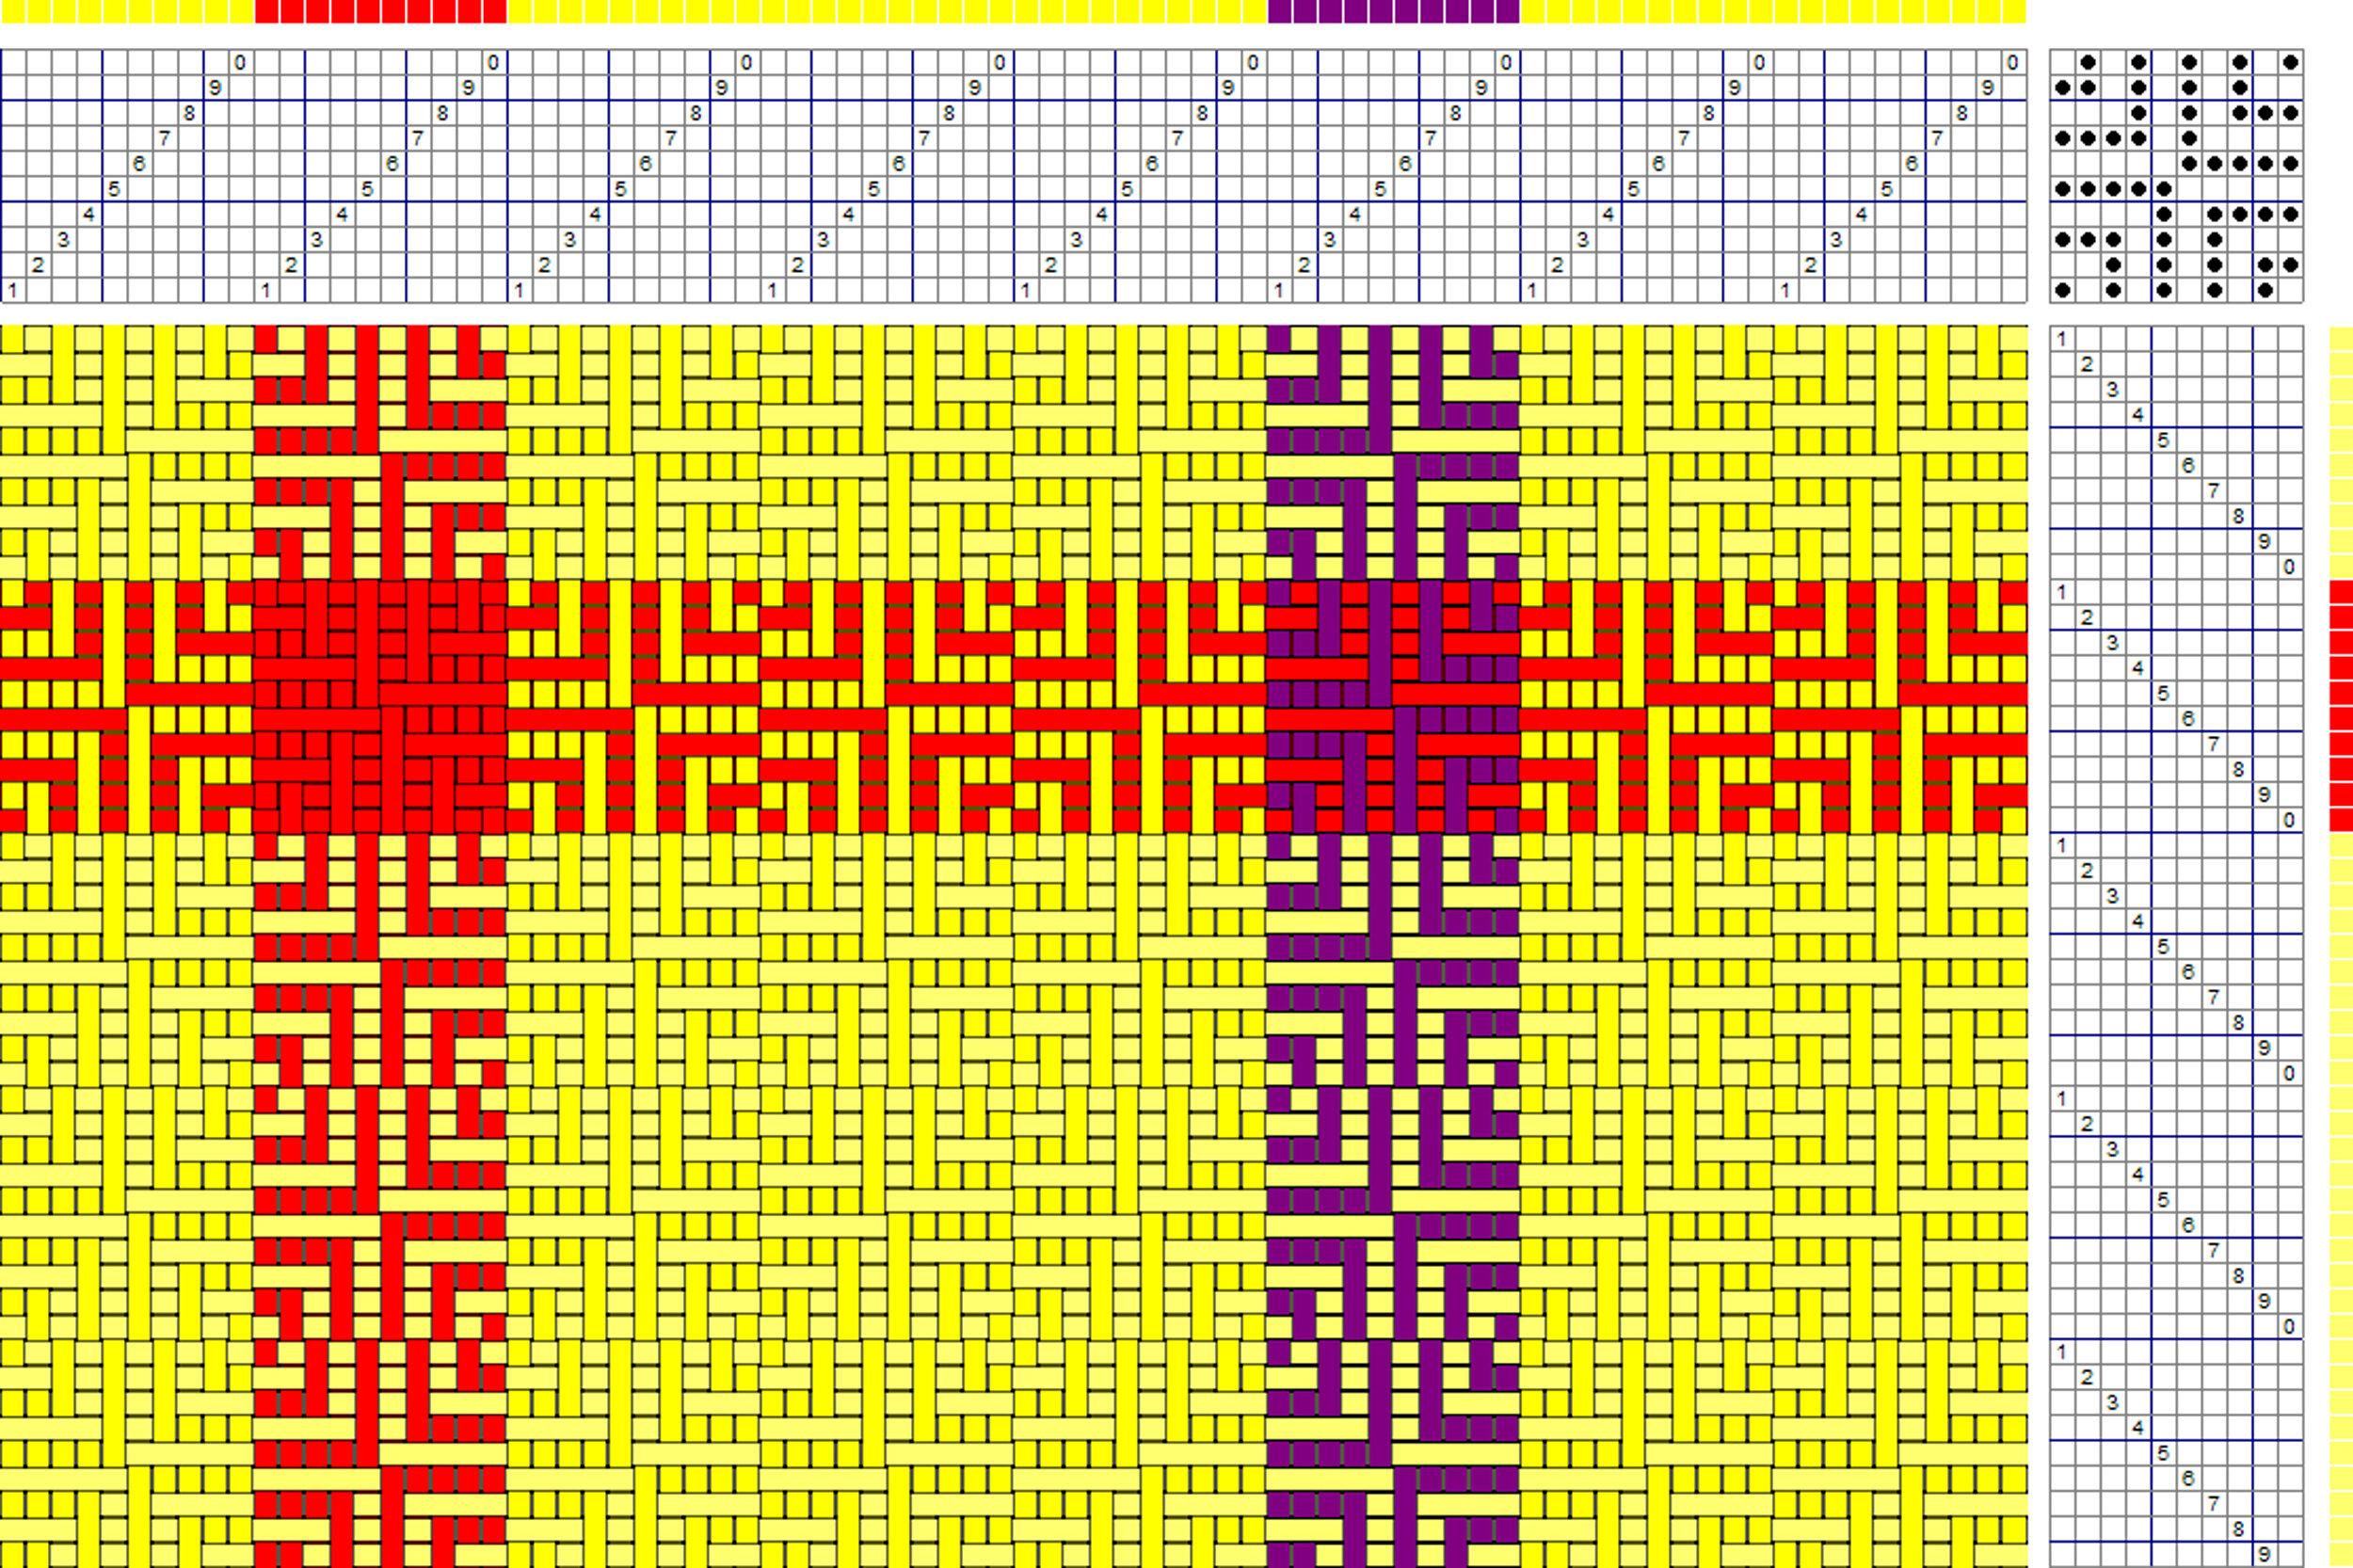
I decided to use this draft for some towels in bright confetti colors. (Full confession – I’ve used this draft, or similar versions, before, so I did know what to plan for. But I won’t spoil it for you. Read on…)
Step 1. Mock it up on the computer. In days gone by, weavers would spend hours laboriously coloring in squares on graph paper, denoting if a warp or weft thread was on the face of the cloth at each intersection. Thankfully, we can now use software to play without the drudgery (hooray for pixeLoom!). When the computer creates a rendition of what the cloth will look like, the weave structure is faithfully interpreted, and if I were weaving with wire, the picture above would be pretty close to the final product. But it doesn’t take into consideration that yarns are flexible, and will bend around each other and snuggle up together if they can.

Step 2.Weave it. While on the loom the yarns are under firm tension, and it looks quite a bit like the software rendition.

Step 3. Finish it. After the miracle of wet-finishing, the yarns find their rightful homes and we finally have real cloth. Who would have guessed those diamonds were in there? Now you can go back to the draft at the top and stare at it as if it were one of those Magic Pictures, and maybe the diamonds will pop out if you cross your eyes just right. Don’t stare too long, though, or your eyes might get stuck that way.